Library for generating SVG programmatically and consistently within Jupyter Lab.
Note that there are a few libraries that provide great SVG programmatic support:
- SVG.js
- Snap.svg
- D3.js
- Processing.org - p5.js
- and a number of others.
Unfortunately, most of them require a DOM, and must be run client side - meaning that the results are lost on export.
The utility here is a wrapper for SVG.js, so SVGs can be rendered either Server-Side (within the Notebook) or Client Side (within the browser rendering the notebook - but lost on export)
(NOTE: embed is executed client side simply through ijs.htmlScript)


Note on Transforms
If you need to combine multiple transforms, we would recommend you use matrices instead, like the following:
utils.svg.render({ width: 400, height: 200,
    onReady: ({el, width, height, SVG }) => {
        const yellowTransition = new SVG.Color('#FF0000').to('#00FF00');
        for (let i = 0; i <=5; i++){
            el.rect(100, 100)
                .fill(yellowTransition.at(i * 0.2).toHex())
                .transform(
                    new SVG.Matrix()
                        .translate(i * 20, 0)
                        .rotate(45)
                        .translate(100, 0)
                );
        }
    }
})
Alternatives
Since many of the libraries require a window or document instance,
you can always do something similar to the following:
- create a new
jsdomwindow and document - store the window and document to the
globalorglobalThisscope - create an instance of an svg element
- THEN import the libraries (now window and document are available)
- ... manipulate the svg with the library
- FINALLY - capture the svg.outerHTML, and render to $$.svg() / mimetype
The goal with this library is to provide a simple alternative for common scenarios
P5
Note that other great SVG Libraries are always available:
The simplest is to run them with ijs.htmlScript and run in the browser, and pull requests are always welcome.
Here is an example running P5.js, without even using the svg module:
See here for more on instance mode
utils.ijs.htmlScript({
    scripts: [
        'https://cdn.jsdelivr.net/npm/p5@1.4.1/lib/p5.js'
    ],
    debug: true,
    onReady: ({rootEl}) => {
        const p5_Setup = (p) => {
            let x = 100;
            let y = 100;

            p.setup = function() {
                p.createCanvas(700, 410);
            }

            p.draw = function() {
                p.background(0);
                p.fill(255);
                p.rect(x,y,50,50);
            }
        };
        const myP5 = new p5(p5_Setup, rootEl);
    }
})

Members
(static) utilityFunctions
Self-Contained functions - suitable to run client side when running svg.embed
Methods
(static) embed(options)
Renders an SVG through a browser side instance of SVG.js
This is a very nice library that generates, modifies and simplifies some aspects of creating your own SVGs.
Note: server side rendering is meant to be interchangable with the embed version, however there are some differences
- SVGs created on the server are often included in exports.
- Animations are only possible on
embedversions - using requestAnimationFrame and cancelAnimationFrame
Simple Example
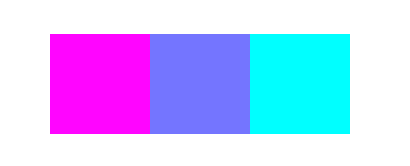
//-- same instance as the svg.render example
utils.svg.render(({el, SVG, width, height}) => {
    const colorTransition = new SVG.Color('#FF00FF').to('#0FF');

    // draw a rectangle
    const firstRect = el.rect(100, 100)
        .fill('#0FF')
        .center(300, 100);

    // clone the rectangle, color it with the color range, and move it relative
    const secondRect = firstRect.clone()
        .fill(colorTransition.at(0))
        .dx(-200)
        .addTo(el);

    firstRect.clone()
        .fill(colorTransition.at(0.5))
        .dx(-100)
        .addTo(el);
});

Animation Example
utils.svg.embed(({ el, SVG, width, height }) => {
    var rect1 = el.rect(100, 100)
        .move(width/2, 0);

    rect1.animate(1000, 0, 'absolute')
        .move(width/2, 100)
        .loop(true, true);
})

With many other complex animations possible

Parameters:
| Name | Type | Description | |||||||||||||||||||||||||||||||||||||||||||||
|---|---|---|---|---|---|---|---|---|---|---|---|---|---|---|---|---|---|---|---|---|---|---|---|---|---|---|---|---|---|---|---|---|---|---|---|---|---|---|---|---|---|---|---|---|---|---|---|
options |
Object | options to use for drawing - or an onReady function Properties
|
(static) render(options)
Renders an SVG through a server side instance of SVG.js
This is a very nice library that generates, modifies and simplifies some aspects of creating your own SVGs.
Note: server side rendering is meant to be interchangable with the embed version, however there are some differences
- SVGs created on the server are often included in exports.
- Animations are only possible on
embedversions - using requestAnimationFrame and cancelAnimationFrame
Simple Example
utils.svg.render(({el, SVG, width, height}) => {
    const colorTransition = new SVG.Color('#FF00FF').to('#0FF');

    // draw a rectangle
    const firstRect = el.rect(100, 100)
        .fill('#0FF')
        .center(300, 100);

    // clone the rectangle, color it with the color range, and move it relative
    const secondRect = firstRect.clone()
        .fill(colorTransition.at(0))
        .dx(-200)
        .addTo(el);

    firstRect.clone()
        .fill(colorTransition.at(0.5))
        .dx(-100)
        .addTo(el);
});
More Complex Example
//-- use loops and logic to create shapes
utils.svg.render({
    width: 400, height: 400, debug: false,
    onReady: ({ el, SVG, width, height }) => {
        const transition = new SVG.Color('#0d4fa6').to('#ffff00');
        const colorTransition = (val) => transition.at(val).toHex();

        const centerBox = el.rect(10, 10)
            .center(width / 2, height / 2)
            .fill(colorTransition(0));
        let currentBox = centerBox;
        let beforeBox = centerBox;

        const numSteps = 20;
        for (let i = 0; i < numSteps; i++) {
            beforeBox = currentBox;
            currentBox = beforeBox.clone()
                .insertBefore(beforeBox)
                .fill({ color: colorTransition((1/numSteps) * i) })
                .scale(1.2)
                .rotate(16)
        }
    }
})
Parameters:
| Name | Type | Description | |||||||||||||||||||||||||||||||||||||||||||||||||||
|---|---|---|---|---|---|---|---|---|---|---|---|---|---|---|---|---|---|---|---|---|---|---|---|---|---|---|---|---|---|---|---|---|---|---|---|---|---|---|---|---|---|---|---|---|---|---|---|---|---|---|---|---|---|
options |
Object | options to use for drawing - or an onReady function Properties
|